- Tifa Cosplay Costume and Ideas Guide - November 30, 2021
When it comes to popular RPG games from the ’90s, “Final Fantasy” definitely comes to mind. Final Fantasy VII, in particular, was so well-received it won numerous awards and cemented itself as one of the best RPG games of all time.
Final Fantasy VII tells the adventure of First Class SOLDIER-turned-mercenary Cloud Strife who lost his memories and was hired by an eco-terrorist insurgent group called Avalanche. The group is led by Barret Wallace and has the sole purpose of saving the planet by opposing the Shinra Electric Power Company, the so-called “big-bad” of the series — that is, until a secret is revealed and a bigger threat appears in the form of Sephiroth.
Who is Tifa Lockhart?
At first, players are led to believe that Tifa is merely a member of Avalanche. It is later revealed, however, that she is also Cloud’s childhood friend. She and Cloud hail from Nibelheim, a mountainous village in the western continent of Gaia — also known as The Planet.
When they were younger, Cloud made a promise to Tifa that he would go to Midgar to become a SOLDIER, and that he would come to her rescue whenever she needed him to. After Cloud’s departure, Tifa trained with a proficient martial artist, Zangan, and became a local guide for tourists that came to visit her hometown. Later on, she met First Class SOLDIER and legendary hero Sephiroth, who was ordered by Shinra to visit Mt. Nibel near her hometown and investigate the appearance of monsters near the mako reactor there.
Due to a twisted revelation found in the property dubbed The Shinra Mansion, Sephiroth plunged into despair and emerged as a villain who was hellbent to destroy the world. He burned down Nibelheim Village before storming back to the reactor, hurting Tifa in the process.
Sephiroth was later stopped by none other than Cloud, who fainted after he did so. He was then taken by Professor Hojo, a scientist working for Shinra, to be experimented on without Tifa’s knowledge. With her hometown destroyed, Tifa then moved to Midgar and opened a bar called Seventh Heaven before reuniting with Cloud a few years later.
Cosplaying Tifa Lockhart
Tifa has several different outfits, and the first thing you need to do is to choose which version you want to cosplay. This tifa cosplay costume and ideas guide will cover the following:
- Default Costume (Final Fantasy: Advent Children & Kingdom Hearts)
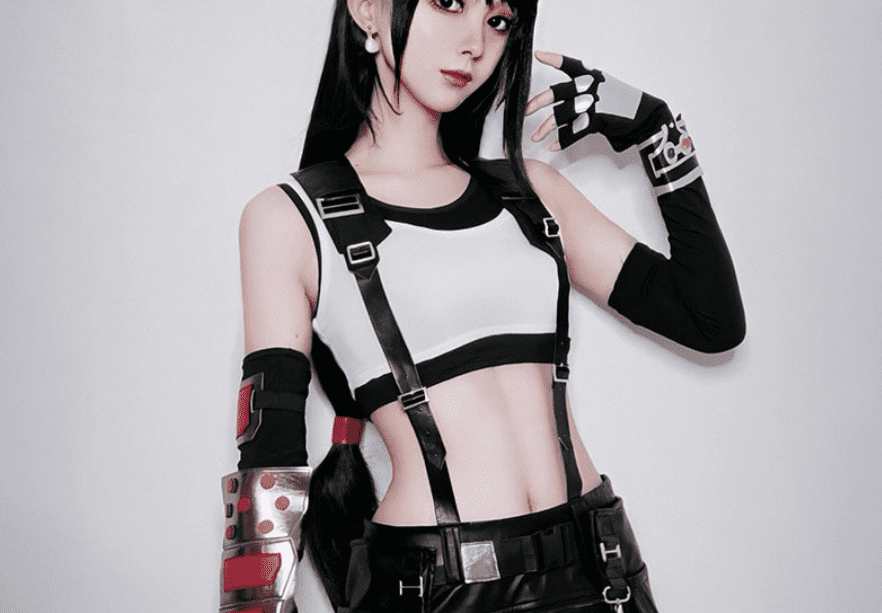
- Default Costume (Final Fantasy VII Remake)
- Refined Dress (Final Fantasy VII Remake)
- Sporty Dress (Final Fantasy VII Remake)
- Exotic Dress (Final Fantasy VII Remake)
A quick disclaimer, this guide is made based on my personal experience and experience of others in the South East Asia cosplaying scenes and by no means needs to be followed to a tee. Cosplaying is about having fun, so even if you don’t follow this guide 100%, you can still cosplay as you wish.
Default Costume (FF: Advent Children & Kingdom Hearts)
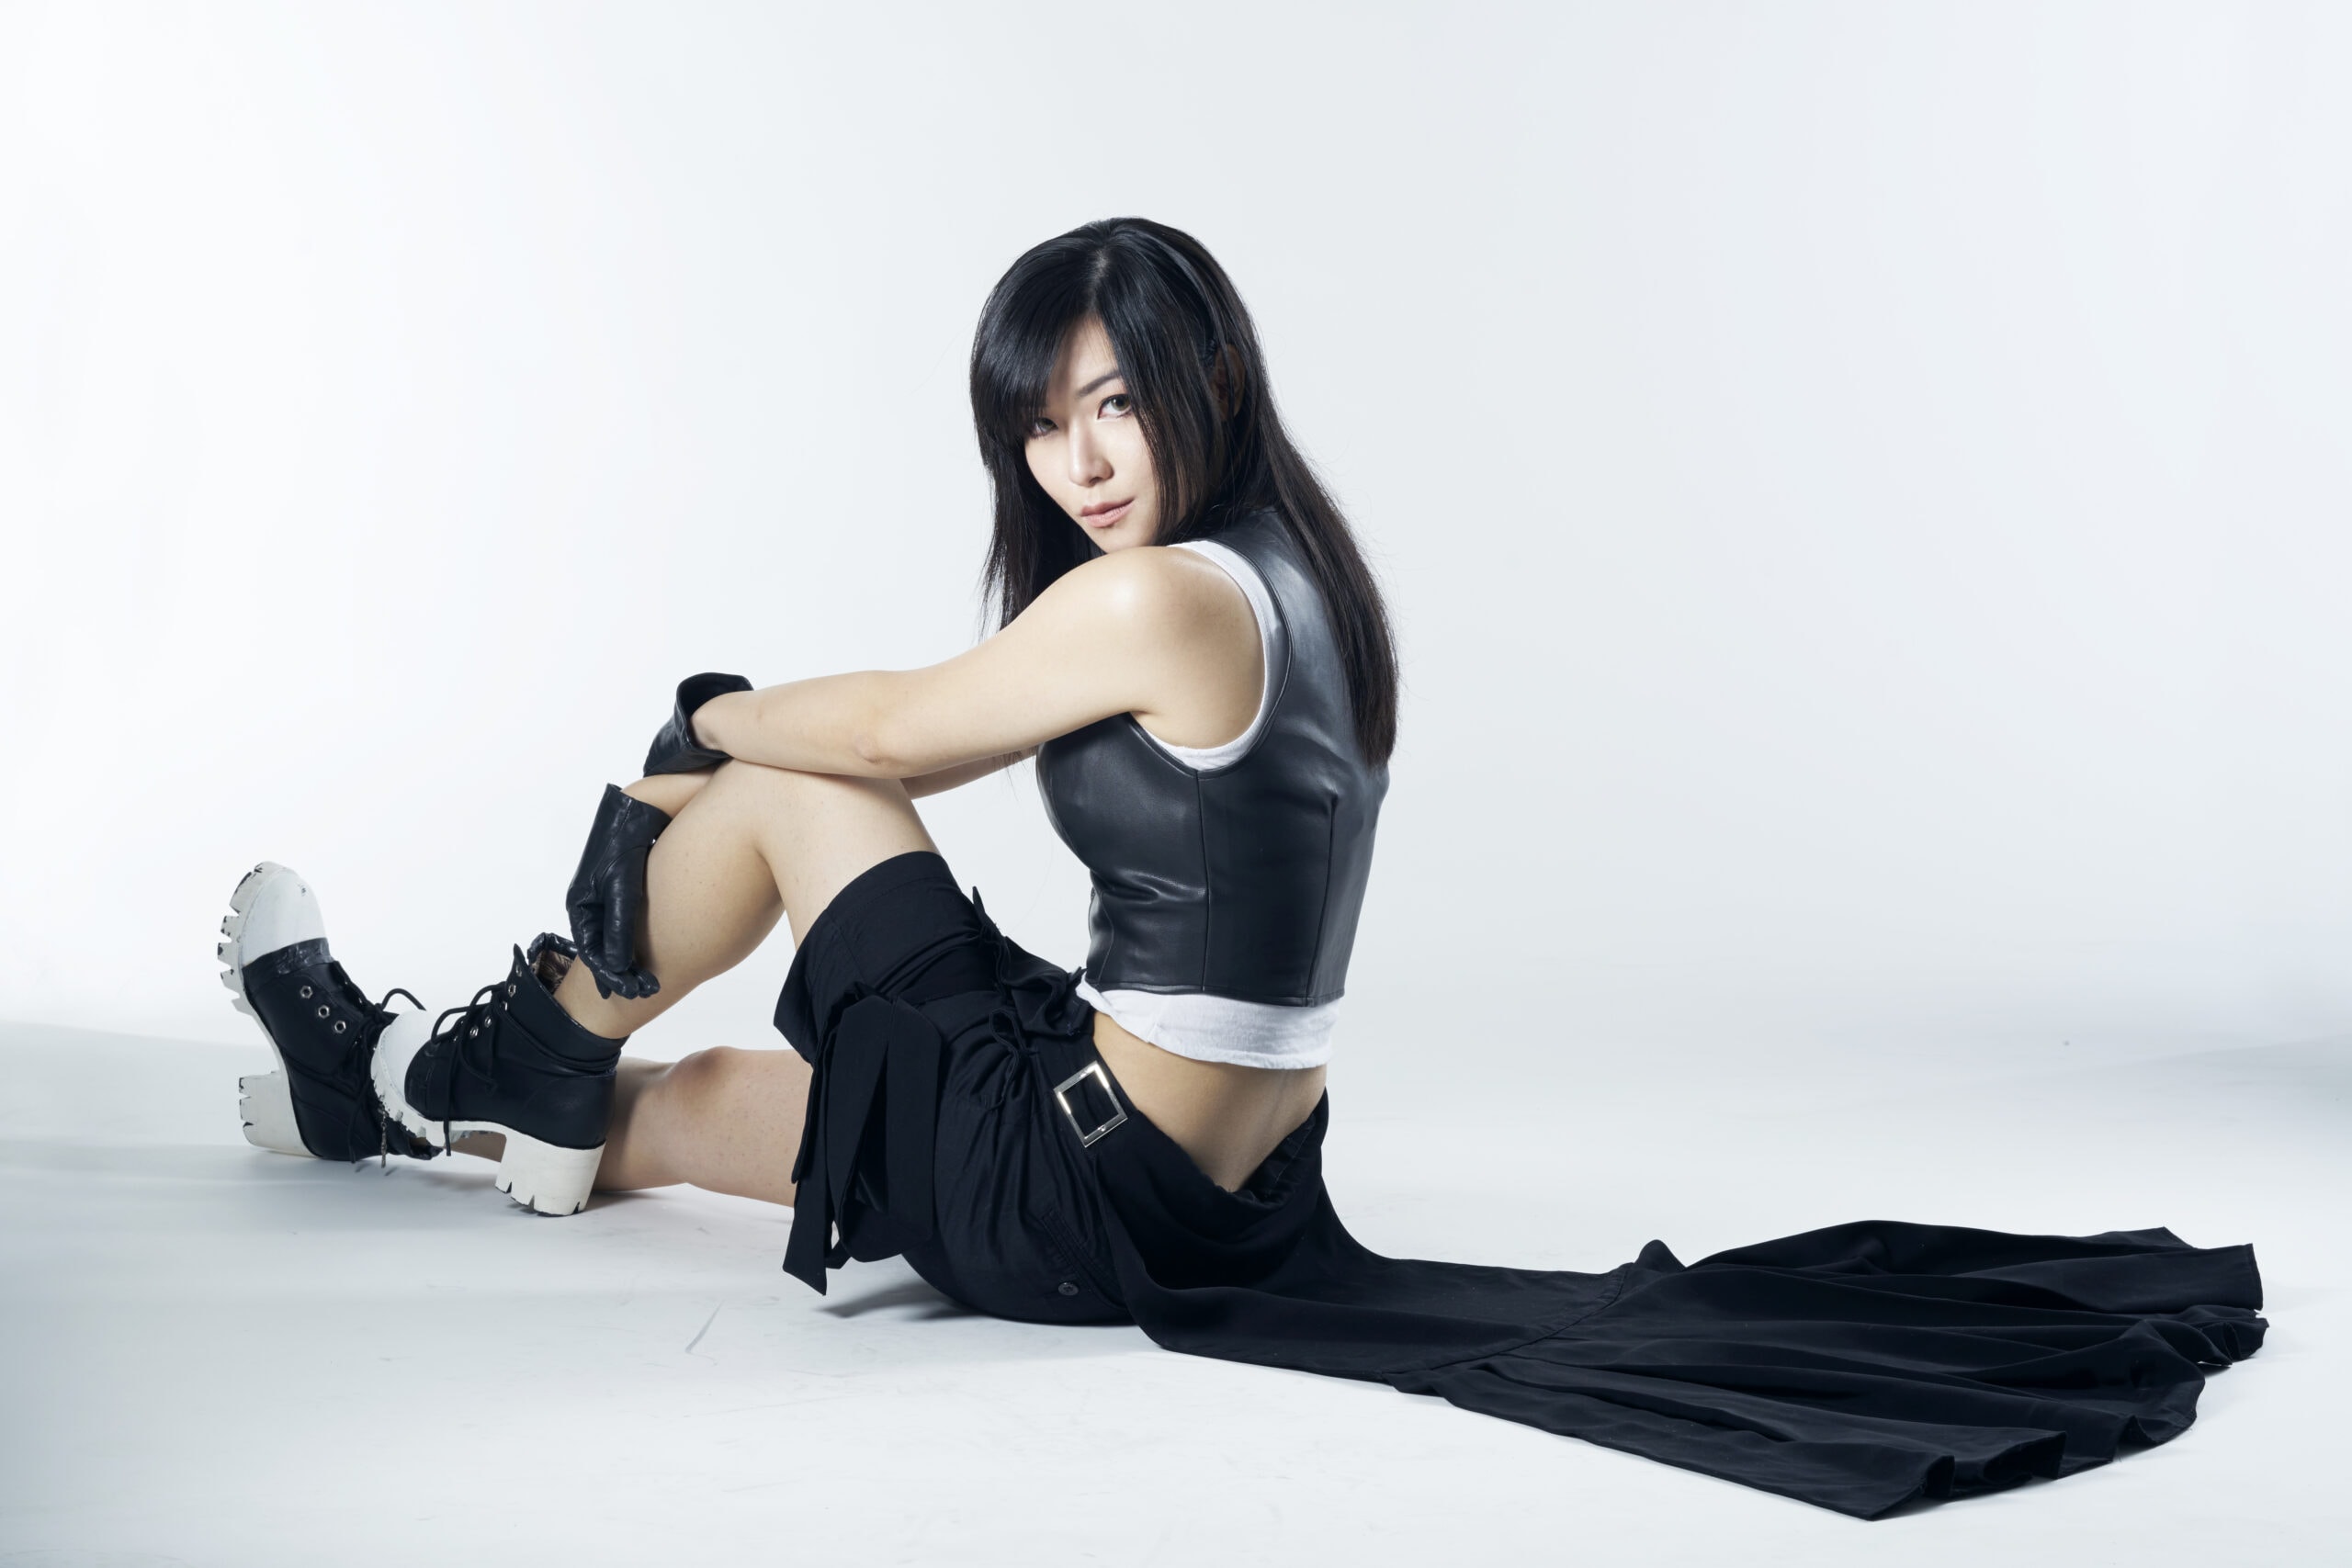
Cosplayer: Shizu, Photographer: Nik
Background
This costume is used by Tifa in Final Fantasy VII: Advent Children, a feature-length movie by Square Enix that was the pinnacle of CGI effects during its time. The costume has a black-and-white color theme, and consists of a black sleeveless top, a white inner shirt, a pair of black gloves, a black skirt-shorts hybrid bottom with buttoned belt loops, and silver buckles, and a pair of black shoes with white front parts and soles. This costume is also featured in her appearance in Kingdom Hearts.
Costume Materials
- Black leather/faux leather/pleather/vinyl (for the blacktop)
- Silver metal-toothed zipper (for the blacktop)
- White t-shirt (optional if making from scratch)
- Black gloves (optional if making from scratch)
- Black shorts (optional if making from scratch)
- Silver belt buckles (for the skirt-shorts)
- Black two-hole flat buttons (for the skirt-shorts)
- Black cotton/cotton blend (for the skirt-shorts)
- Black sports shoes (please do not make from scratch)
- White acrylic paint or PVC tape (for the shoes)
- Plastic accessories/Swarovski crystal (for the single earring)
- Red ribbon (to be tied on the left arm)
Costume Construction
Sleeveless Top
While buying a sleeveless top is the easiest thing to do, you have to take into account that Tifa’s top is body-fitting. It is advisable to make or tailor your own top according to your measurements. If you are not blessed by the Seamstress Goddess like me, there is a trick to help you with this.
Take any body-fitting top you have and trace an outline of your top on your chosen fabric on the reverse side. Make sure to add around 0.5-1.0 inches (~1.2-2.4 cm) of the bleed area when you trace the top and put a small mark so you know which is the bleed area.
Once you are done tracing, cut accordingly and sew/stitch along the outline between the bleed area and the inner area. When you have finished, flip the fabric inside out, and you got yourself a top.
Make sure to wear them to test the fit. If you find it too tight, you can unpick the stitching and give yourself more room (that’s what the bleed area is for). Otherwise, you can remake it from scratch — which is painful, but something we cosplayers find ourselves doing at times when the fabric is completely unsalvageable. Finally, sew the metal zipper onto the middle of the top.
Alternatively, you can invest in a mannequin so you can simply make the pattern on it. For a budget-friendly mannequin, check this duct-tape dummy tutorial.
Inner Shirt
The white inner shirt looks pretty innocent, but don’t let the simplicity of it fool you. The shirt is constructed in a way that the sleeves peek out from inside the black top. To put it bluntly, you can’t just buy another sleeveless top and wear it inside, because sleeveless tops are, well, sleeveless. The “sleeves” of said shirt need to be around 0.5-1.0 inch (~1.2-2.4 cm) longer than the black outer top’s nonexistent sleeves, and this is very rare to find off the shelf.
For this costume, Ms. Shizu used a spandex t-shirt with their sleeves cut off and hemmed. This way, you don’t have to construct the t-shirt from scratch, and it is a real time-saver. Of course, you can also tailor or create it from scratch using the same method I discussed on the sleeveless top section if you wish. That will definitely be the best fit.
Gloves
If you are new to the world of despair— I mean cosplaying, I would highly recommend buying a pair of gloves and modifying them rather than making them from scratch. Yes, there are tutorials like one talented lady here made on how to create your own pair of gloves, but it requires you to own and operate a sewing machine if you want a neat result.
Please do not attempt to hand sew them for your own sanity (trust me). The ones used by Ms. Shizu in the pictures above are store-bought as well.
Skirt-Shorts
The shorts Ms. Shizu used for this cosplay was a black, store-bought cotton Bermuda that was modified to suit the original costume. If you notice, there are belt buckles at each side of the shorts around the hip area. These are not real belts, so you need to separately sew the silver buckles onto the shorts. There are also belt loops that are sewn onto the bottom of the shorts, fastened with the buttons.
Then, we need to create the “apron” and dress train/overskirt. You can use cotton or cotton blend fabric and cut them based on your height and proportion. Ms. Shizu said that hers “have plastic boning sewn across the top to prevent buckling and creasing. The apron is “worn tucked into the front of the shorts and snapped into place”, while the overskirt is “sewn into the back of the shorts”.
Shoes
For your own sanity and safety, please do not attempt to make shoes from scratch and buy a pair of black shoes Instead. Find a pair of shoes that mimic the shoes Tifa wears from local thrift stores or affordable online shops such as Tao Bao or Ali Express, and then customize them by using either acrylic paint/fabric paint or PVC tape.
You usually use fabric paint only if the shoes you want to modify are made of fabric. Otherwise, acrylic paint is preferable since it is easy to use and dry pretty quickly. Try having one layer of paint and wait until it dries. Afterward, repeat the process 1-2 more times until the area is evenly covered with the color of choice.
Alternatively, you can use PVC tapes. I have done this before for a costume and it worked pretty well, but it depends on the surface. The great part about tapes is the fact that they create little to no mess and lingering smell, so you can even do it indoors.
The drawback? It doesn’t work on all surfaces, and you have to cut and shape them so they don’t leave noticeable sticky lines. If you don’t care about them, though, you can just wrap the shoe area around with the tape as you please.
Red Ribbon
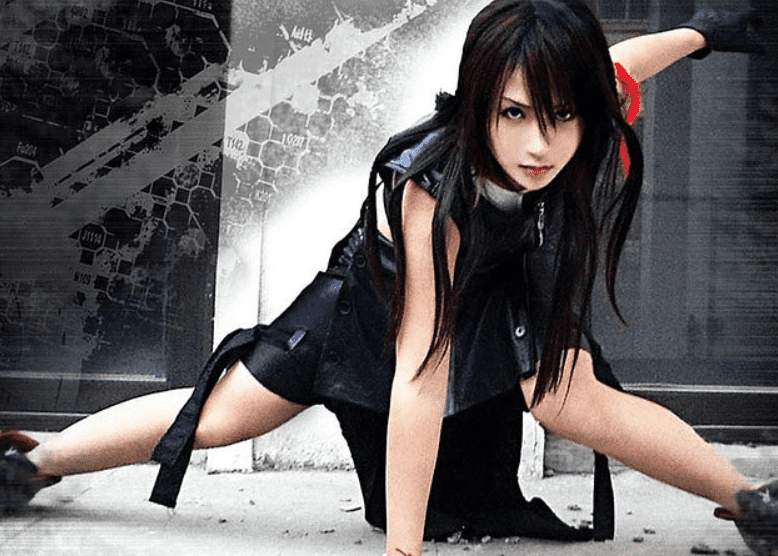
Finally, don’t forget to tie the red ribbon on your left arm to complete the looks. Arguably said to be pink instead of red in canon, this gesture is in remembrance of a certain character that is very dear to everyone’s heart…
Nevertheless, if you want to save time and effort, you may also opt to purchase this costume online.
Hair or Wig Styling
Tifa doesn’t need a lot of hairstyling (thankfully). You can work with a long, straight black wig with bangs. Or, if you happen to have hair in a similar color and style, you can simply use your own hair (it definitely looks more natural and gives you more confidence during action shots).
Some tips in wearing a wig: you need to make sure that it fits your head and forehead, since most cosplay wigs don’t have sizes and are customizable only through the use of the straps you find at the inner part of the wigs. If the bang is too long, it is advisable to trim it.
If the wig has a shaggy hairstyle, some cosplayers prefer using a razor to trim the bangs to preserve the natural looks. If the bangs are straight, however, you can use a pair of scissors.
Next, you need to ensure you get the correct parting (left). Sometimes when we see a cosplay reference picture, we can get mixed up between left and right because it is not a mirror image. Before suiting up, I usually check the reference picture one last time to make sure I get it right.
Most non-character-specific wigs do not have any parting, so you can use hair gel to make one.
Makeup
At a glance, it looks as if Tifa is not wearing any makeup (and this might be true) — but any seasoned cosplayer knows that there is no such thing as a no-makeup cosplay (okay, maybe if your face or head is fully covered). Even if the character is not wearing any, you will most likely still use basic or nude makeup to enhance your appearance, especially if you are planning to appear in photos or on stage for a performance.
To achieve that Final Fantasy-Esque liquid-smooth skin, a primer or makeup base is commonly used; followed by moisturizer, concealer (if necessary), and makeup setting spray once makeup has been applied (optional depending on your skin). You can choose the type of primer, base, and concealer based on your skin tone — a kind staff at a local cosmetic store should be able to assist you on this.
For the sake of familiarity, I will make this guide based on East Asian-type eyes. Tifa has almond-shaped eyes, and some of us have monolids or double eyelids that either only appear on one eye or are not pronounced enough to be categorized as double eyelids. This is usually remedied by using eyelid glue or double-eyelid tapes.
Next, you use false eyelashes and black eyeliner (if you want a softer finish, you can switch eyeliner with black/dark brown eyeshadows). You may also opt to wear a pair of dark brown contacts if you have a different eye color.
Some cosplayers I know shave their eyebrows so they are easier to shape depending on the character they want to cosplay, but if you do not wish to go that far, there is a trick to conceal your real eyebrows. You will need a glue stick, (liquid) concealer, and powder. There is a nice tutorial that can walk you through the whole process here.
After you conceal your real eyebrows, you can draw Tifa’s eyebrows over your real ones. She has dark brown eyebrows, so get an eyebrow pencil of similar color to draw them with. Make sure to arch the eyebrows as per the reference pictures for that extra accuracy.
Next, use a combination of bronzer and highlighter to accentuate your nose (either to sharpen it or thin it or both), followed by using a lip balm or nude lipstick on your lips to complete the look.
Tifa also wears a single earring on her left ear. You can purchase one from Etsy, or you can make your own using Swarovski (or similar) pendant and other accessories that you can source from local accessories/craft stores. Otherwise, you can also use resin.
Default Costume (FF VII Remake)
Background
This costume is arguably the most well-known costume Tifa has as it was the costume she was first revealed in when the game was first announced back in 1997. This Remake version has some differences compared to the original 1997 version, namely the color of the gloves and the addition of the black stockings. Nevertheless, this version remains iconic throughout the decades.
Costume Materials
- Black spandex top (if not making your own)
- White spandex top (if not making your own)
- Black leather/faux leather/pleather mini skirt (if not making your own)
- Black leather/faux leather/pleather fabric (for the belts)
- Black used/second-hand black schoolbag/backpack (for the accessories)
- Black cotton arm gloves (for the arms)
- Black leather/faux leather/pleather fingerless gloves
- Black stocking (higher denier preferred)
- Black craft/Worbla foam (for the handguards and materia bracelet)
- Silver aluminum foil (for the hand plates)
- Silver metal belt buckles (for the belts)
- Silver bracelets (for the accessories)
- Red leather/faux leather/pleather fabric OR red spray paint (for the left-hand armor)
- Dark red shoes (find as close of a match as possible)
- White/red craft/Worbla foam (optional for the shoes)
Costume Construction
Tops
It will be much easier to buy the tops from a local sports store, mainly due to the fact that the tops are also very tight-fitting. If you are an experienced seamstress, you can make your own, but stretchable material isn’t the easiest thing to stitch.
If you live in a tropical country or plan to wear this costume at the height of summer, you can “cheat” by sewing the black inner top to the edges of the white top. Again, I need to put another reminder that stitching stretchable material is really hard if you are not experienced. If you have access to a tailor, that will be your best bet.
Skirt
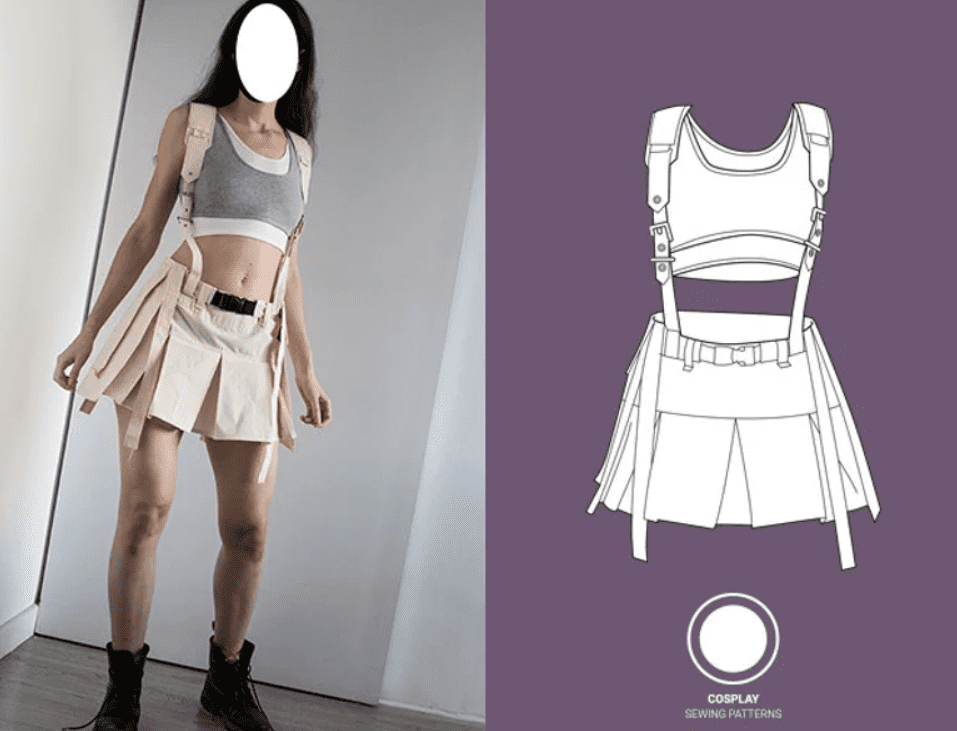
I have costumes made of pleather and PVC before, but you need to really not compromise in terms of quality here. For one, cheap PVC/pleather flaked. A lot. Granted, even real leather flakes if you don’t take care of it properly. But if you purchase a low-quality PVC/pleather, boy, do they flake like crazy. If you can get them from a local store, that would be best since you can feel the fabric in your hands.
However, for you, online shoppers, don’t just fall to the cheapest listing. If you buy them from Amazon, Etsy, Tao Bao or similar shops, make sure you check the ratings and reviews before diving in for the purchase.
Once you get the material, you can start making the skirt. To save your time and sanity (as this is a rather complex skirt), there is an Etsy seller who sells the pattern for the skirt here.
Belt, Pouches, and Suspenders
If you are making your own, you will need to prepare for a lot of cutting and gluing. And I mean a lot. This is thanks to the skirt having several hanging belts along with pouches and suspenders that serve no other purpose than adding some uniqueness to the entire design.
You can create them by cutting several strips of your material and super-gluing them together (or stitching them if you have a sewing machine that can work with tough materials) to create a sturdier piece that can be converted into slim belts that you can attach to the pouches and suspenders. These strips will then be connected with the metal belt buckles accordingly.
Again, the pattern to make the belts, pouches and suspenders are included in the pattern from Etsy above. If you want to cheat with the suspenders, though, you can always get a used black schoolbag/backpack and take the straps so you don’t have to make the top part.
Arm Sleeves
The easiest way is to buy a pair of arm gloves. Make sure that they aren’t made of slippery, satin material but rather the spandex/cotton type. They also make it easier for action poses if you have to pose for a photo shoot or video (or even a skit).
If you notice, the arm sleeves and gloves are made from different materials, so you may want to cut the sleeves near the wrist and conceal it with the bracelet and armor.
Gloves and Accessories
For the right arm, Tifa has a leather-looking glove with metal plates and a bracelet for her to equip her materias on. You can purchase the gloves and then modify them by adding the metal parts by utilizing aluminum (aluminium for non-Americans and non-Canadians) foil that you either sew on or glue to the gloves. If you plan to use glue, make sure it works with the materials that you use (PVC/pleather/faux leather).
You can use black foam or Worbla for the bracelet. Don’t forget to make two circular indents so that you may use the space for your makeshift materias.
Speaking of materias, you can go to your local accessories store to find marbles that fit the size. You can also make your own using resin such as Epoxy plus a few drops of coloring or paint. Make sure you measure the depression on the bracelet with the marbles’ size before cutting them.
For the left arm, you will need to craft the armor using black foam or Worbla as well. Make sure you create the patterns using paper or cloth before transferring them to the foam or Worbla.
For the red portion, you can either use red PVC/pleather/faux leather or spray paint it red to match the color. If you feel that this is too complicated to make, a kind soul sells just the left-hand armor on Etsy.
Stockings and Shoes
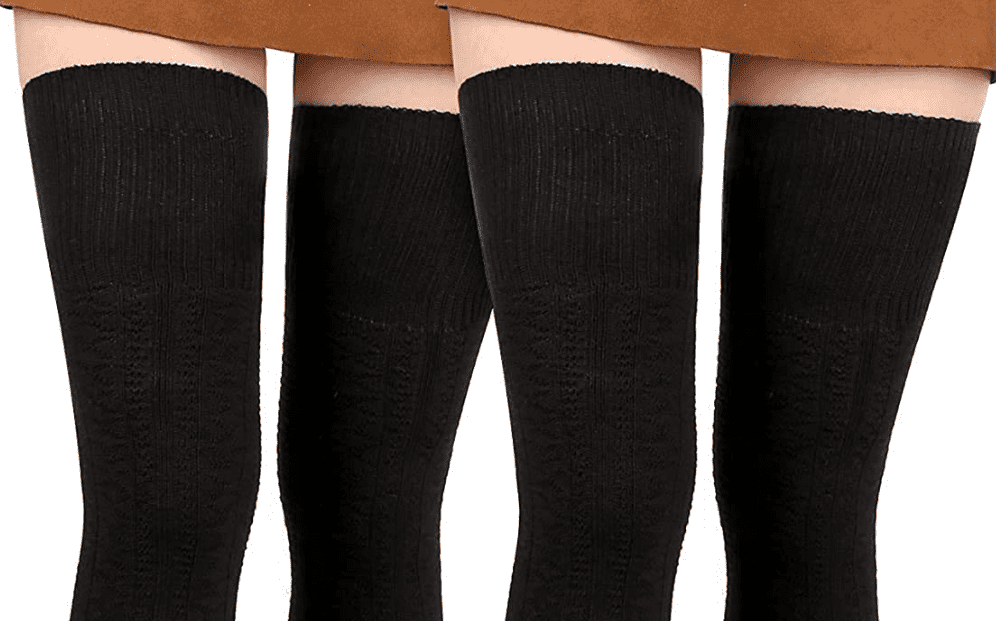
You can purchase a pair of black stockings at your local store or online, preferably with high deniers, which translates to higher opacity. Please make sure you don’t purchase the soft, see-through type.
For the shoes, you would want to either commission someone or modify a pair of deep red mountain or winter shoes with Worbla or foam for parts that may not be present on the bought shoes.
If you are in a rush or don’t feel like making the whole costume yourself, fret not! There are several ready-made costumes available for purchasing online at a single click of your mouse or a tap on your smartphone.
Hair or Wig Styling
Tifa doesn’t have a different hairstyle than the one mentioned previously for the Advent Children default costume, so you can follow the steps described above.
She also still wears the single earring on her left ear, which you can purchase from local craft stores or make with resin as mentioned.
Makeup
The makeup for this costume is pretty much the same as the one for the Advent Children costume above. To recap, primer/base, moisturizer to prevent breakout from the long use of makeup, concealer to hide any blemish/imperfection and makeup setting spray for the last touch. Don’t forget to also wear lip gloss to add that sheen on the lips.
Refined Dress (FF VII Remake)
Background
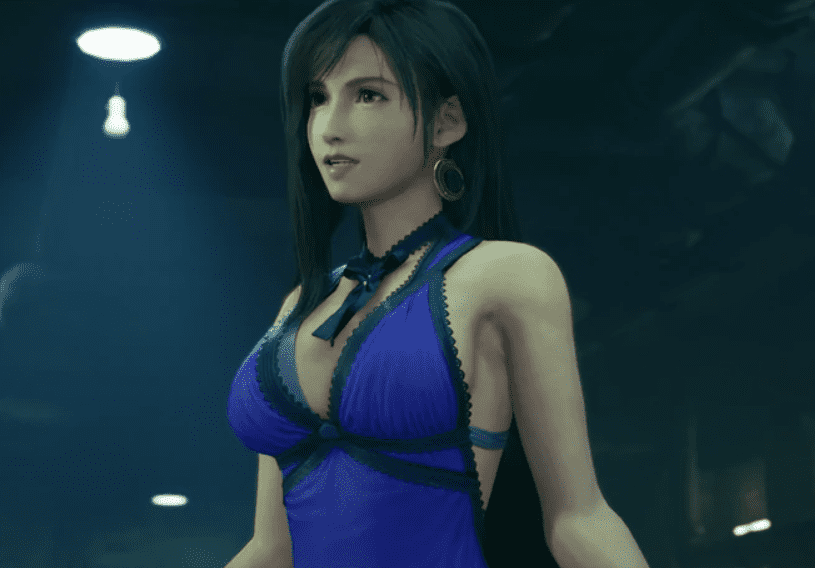
In Final Fantasy VII Remake, there is a dress mechanic where players can unlock certain costumes based on the choices they made during and before Chapter 9: “The Town that Never Sleeps”. Based on this guide, players can simply either skip all the side quests or skip the “Alone at Last” quest in Chapter 3: “Home Sweet Slum” to get the Refined Dress.
The costume consists of a low-cut, indigo/dark blue satin dress paired with a matching necktie-and-bow and pair of shoes. It is also adorned with a chic belt accessorized with pearl and faux flowers. A single, golden crescent earring completes the look.
Costume Materials
- Bra cups (to give shape for the bust area)
- Crescent moon accessories (for the earring)
- Indigo bra straps (optional, for the back strap)
- Indigo/dark blue satin (for the dress)
- Indigo/dark blue striped ribbon (for the necktie-and-bow)
- Indigo/dark blue small rope accessories (for the necktie-and-bow)
- Black trimmings (for the dress and ribbon)
- Black small rope accessories (for the belt and shoes)
- Black felt (for the flower accessories on the belt and shoes)
- Faux indigo or dark blue pearl or white (artwork version) accessories (for the belt)
- Small bells accessories (for the shoes)
- Small faux diamond or crystal (for the necktie-and-bow)
- Indigo/dark blue heels (try to match the color, otherwise you need to spray-paint them)
- Velcro or button (either one is optional, for fixing the neck bow to the necktie)
Costume Construction
Dress
You will ideally need a mannequin or a dummy for this, but this may also work without them if you put in more effort. There is usually a pattern you can get online for this type of dress. Otherwise, I would suggest getting a swimsuit with a low cut, which pattern you can replicate.
Trace the swimsuit with the usual bleed area of 0.5-1.0 inch (~1.2-2.4 cm) on a test fabric or newspaper and then fit it on either yourself or the mannequin/dummy. Since you want it to really fit your body, use a pin to mark the area that needs to be cut or sewn together so you know it can fit you well on the real fabric.
After you’re done, add the trimmings as per the reference picture. Do add bra cups inside to give form to the bust area. Also, please note that the “X” at the back (a.k.a. the back strap) isn’t an extension to the trimming, but a separate part instead. If you want to save time, you can use a pair of bra straps in similar color and sew a bra hook each left and right below the below-bust area and also at the shoulders area.
Depending on the fabric, there is a trick to make the edges of the skirt curl, which is to place them over high heat using either a heat gun or fire from a matchstick or lighter. You might want to test heating the fabric first before heating the real deal because it doesn’t work on all kinds of fabric.
Necktie-and-Bow
The necktie-and-bow looks complicated but is actually pretty easy to make. Measure your neck circumference and cut the striped indigo ribbon that you bought, and then sew or glue the black trimmings at the back of the ribbon. Next, use the same ribbon and cut them to form the “star” at the center. Glue two pieces of small faux diamond or crystal accordingly and add the small rope accessories.
Finally, fix them to the necktie part using either Velcro or by sewing a button. Each end of the ribbon for the tie part can also be fastened by Velcro or by sewing a button (or use a fastener if you want to be extra safe).
Belt
The belt part consists of the black rope, the faux indigo or dark blue pearl, and accessories that you can make using felt. For the faux pearls, please make sure to purchase the pearl accessories that come with a hole on top to slide the rope in. Otherwise, they will not work.
Fashion the ropes as per the reference picture and glue the triangles and rose made of felt to the rope (or you can also create a loop with the felt to slide the rope in — please ensure that the loops aren’t too wide, otherwise they would look sloppy when worn).
I would advise actually sewing or fastening the ropes onto the dress itself to prevent them from falling off or moving while worn. Otherwise, you can sew a fastener to the dress and then hook them with the fastener that you attach to the ropes. This way, you can wash them separately. Otherwise, just sew it onto the dress.
Shoes
As per usual, it is advisable to find a pair of ready-made heels in as close as possible color as your dress fabric. In fact, it is probably easier to find the fabric that matches your heels, so you can also match the fabric with the shoes even if the color is slightly off from the reference picture. I personally feel it’s better to match the fabric and the shoes instead of sticking to the color in the reference picture and then having a mismatch-colored pair of shoes and dress.
Use the black felt to create the “shoes belt” and flower accessories, and then add the small rope and small bells to finish the looks. You can also substitute felt with something sturdier like PVC or similar, but since you only need a bit of them, you can also use felt to save cost.
Again, if you ever feel the need to just buy ready-made costumes, you can always do so!
Hair or Wig Styling
As per the previous two costumes, Tifa’s hairstyle is still the same even with this costume. The only difference being the single earring that is shaped like a crescent moon instead of her usual tear-shaped one.
For the earring, you can save time by purchasing similar accessories. Otherwise, you can make one by using either jumping clay painted gold or by simply cutting the shape from gold-colored cardboard paper or pleather and then attaching it to an earring hook. You can buy all of these at your local craft stores.
Makeup
There is a very faint hint of pale pink on her eyes for this costume, so brush a thin veil of pink eyeshadow after the usual skincare routine. She also has a pair of more pronounced eyelashes, so you can wear false eyelashes to enhance this. You can find these at local beauty stores.
Last but not the least, there is also a simple cat eye-shaped eyeliner on this version. This look is best achieved with liquid eyeliner. You can then follow some tutorial techniques based on your eye shape for drawing the cat-eye style.
Sporty Dress (FF VII Remake)
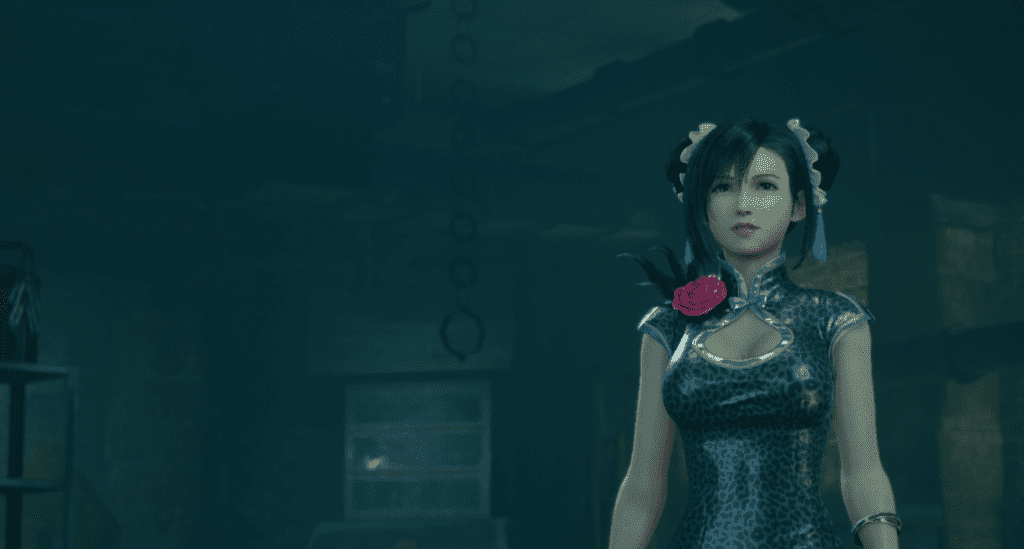
Background
Similar to the Refined Dress, there is a dress mechanic in the game for players to unlock this Sporty Dress based on the choices they made during and before Chapter 9: “The Town that Never Sleeps”. Based on this guide, players need to complete all the odd jobs so they can unlock the “Alone at Last” quest.
Here, Tifa will ask Cloud on what to wear, in which players may choose either the Refined Dress, the Sporty Dress or the Exotic Dress. Otherwise, Tifa can only opt to wear the Refined Dress.
The costume consists of a satin cheongsam (also known as qipao) with what looks to be snow leopard pattern and a huge, pink flower and green leaves corsage on the right shoulder. The dress features a “cleavage window”, and the high slits on each side of the dress are also adorned with a white ribbon on top. Tifa sports a twin-buns hairstyle here and wears a pair of net stockings and multiple bracelets.
Costume Materials
- Printed pleather with snow leopard pattern (for the dress)
- Silver pleather (for the neck, dress slit areas and dress)
- Bright pink flower and leaves accessories (optional if not making your own corsage)
- Bright pink and dark green felt (optional if making your own corsage)
- Pale pink scrunchies (2 pieces, for the hair accessories)
- Purple trimming ribbon (for the dress, as substitute to embroidery)
- Light blue tassels (2 pieces, for the hair accessories)
- Black net stockings with lace on top (you can add the lace separately as well)
- White heels with grey lining (you can add the lining yourself as well)
- Platinum bracelets (5 pieces)
Costume Construction
Cheongsam/Qipao
First, you need to find a similar sewing pattern online (something like this). For this particular pattern, you need to adjust the height of the slits, the size and shape of the “cleavage window” and forgo the long sleeves. As per common practice, cut the pattern on a paper or test fabric before using the intended fabric. Afterwards, make more adjustments depending on your body shape and height (remember, this cheongsam/qipao is supposed to be body-hugging).
Warning! Since this is not a usual fabric that is intended for wear, it will be pretty uncomfortable to don this costume. You have two alternatives: line the inside of the costume with fabric intended for inner lining (which will make it even heavier) or switch the fabric to something more wearable (like printed satin). It just won’t have the right sheen, but I believe it is an okay compromise to make.
After you are done with the measurements and cut the intended fabric, sew them according to the pattern (another warning: the pleather will be harder to sew if you intend to use it). Next, take the silver ribbon and use it to line the sleeves, collar, and parts of the dress as per the reference picture.
Now, ideally, you embroider the purple line between the snow leopard patterned fabric and silver ribbon — but if you don’t have the proper sewing machine for that, you can also use purple trimming ribbon (note: this will be harder to do neatly compared to embroidery, but we work with what we have). Finally, make ribbons from the same silver pleather fabric and add them on top of the slits and on the collar (you can either safety-pin them or use a hook).
Flower Corsage
Now, assuming you cannot find similar-looking flower accessories, you can always make one using felt or crepe paper. If the felt or crepe paper for the leaves is not stiff enough, you can add wiring inside or insert a sturdier card stock. To make the edges of the leaves curl a bit, you can use a ruler to run through the card stock (if you use one), and it will naturally curl. Otherwise, you can use wiring to shape the leaves.
Hair Buns Accessories
If you can find hair scrunchies in a similar color, that would really help save your time. Otherwise, you can make your own scrunchies. After you are done, you can sew the tassels to the edge of the scrunchies. To avoid disastrous entangling of both scrunchies and tassels, use detachable bun wigs and attach both scrunchies and tassels to the buns. This will not only save you from a mess, but also save your time styling them.
Net Stockings and High Heels
The pair of net stockings with lace tops can be bought either at various local fashion stores or online. If you are nitpicky about the lace, you can also commission someone to print the exact lace and sew them onto a normal pair of net stockings.
For the heels, find a simple pair of white heels in stores or online. Add the grey linings with either PVC tape or painting them with dark silver or grey acrylic paint.
No time and energy to make the whole costume? Don’t worry, Fam, I got you covered!
Hair or Wig Styling
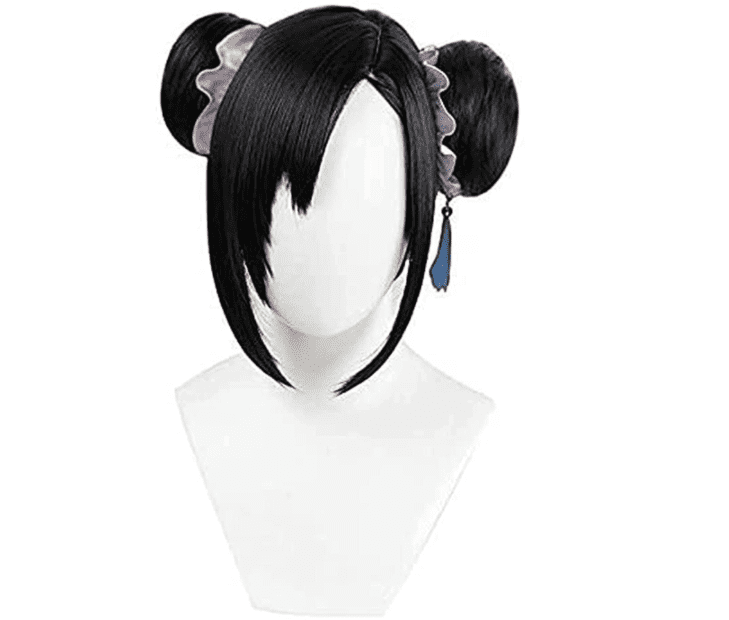
This is the only costume featured in this article that has a different hairstyle. Instead of the usual long, untied hair, Tifa sports twin buns and styled fringe. What we usually do to easily have this hairstyle is to purchase a clip-on wig.
There are some stores online that sell the main wig that you wear normally plus a pair of extensions that can be clipped onto the main wig. This way, you can save time styling your hair or normal wig and can simply pre-style the buns and main wig. They also have several wigs online specifically made for Tifa.
If the main wig doesn’t come pre-styled, you can always use a hair gel to style the fringe and sides as per the reference picture. If you find hair gel to be too weak, some cosplayers also recommend using white glue to keep the wig in place. A word of caution, the style will be fixed and it may not be able to withstand several washes (if at all). And unlike the previous costumes, Tifa doesn’t wear any earrings on this costume version.
Makeup
Similar to the Refined Dress’ make-up, there is also a thin layer of pink eyeshadow for this costume’s version along with the more pronounced eyelashes and thin lip gloss. You can follow the same make-up tutorial for the Refined Dress above.
Exotic Dress (FF VII Remake)
Background
Similar to the Refined Dress and Sporty Dress, this Exotic Dress option will also be available if players complete all the odd jobs and unlock the “Alone at Last” quest in Chapter 3: “Home Sweet Slum”. Once players have cleared the special quest, the options for Cloud to choose Sporty Dress and Exotic Dress will be unlocked when Tifa asks him what to wear.
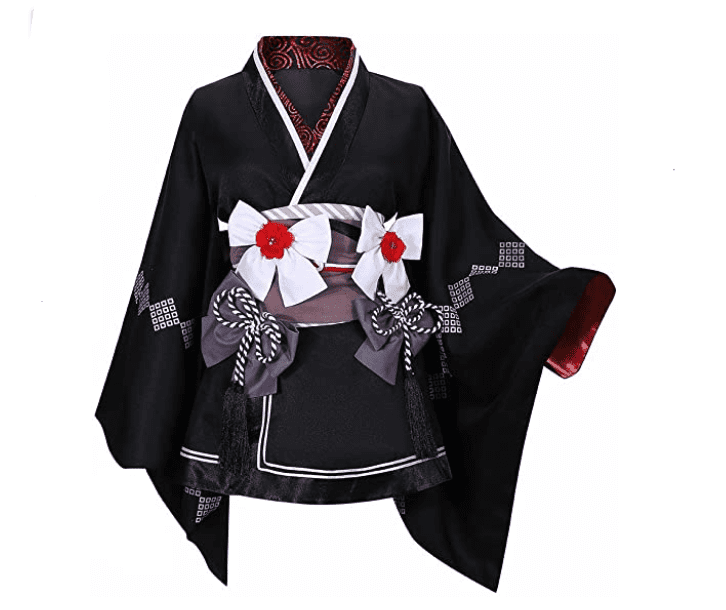
The costume is a set of black hybrid kimono. The skirt is short (which makes it look like an extended haori) — and the haneri (the fabric that peeks out from behind the kimono), obi (sash) and obiage (the fabric that peeks out from behind the top and bottom of the sash) have patterns not usually found in traditional kimonos; while the obijime (the belt that ties the sash) has elaborate ribbons with flowers in the middle. There is also a gathered black fabric below the obi. Each gathered spot is adorned with traditional-looking silver ribbons.
Tifa also wears a pair of black tights tied with a small silver rope paired with black boots. She also wears a decorated headband that is adorned with multiple pink flowers and a delicate kanzashi.
Costume Materials
- Black semi-matte fabric (preferably cotton satin or similar, for the top)
- Black soft fabric (preferably satin or similar, for the gathered fabric and linings)
- White trimming ribbon (for the collar if you want to cheat)
- White, grey and gold fabric paint (for the kimono pattern)
- Silver ropes (for the waist ribbons and tights)
- Silver fabric (for the waist ribbons)
- Silver tassels (for the waist ribbons, 4 pieces)
- Red, patterned fabric (for the haneri)
- White, zebra-patterned fabric (for the obiage)
- Purple, crocodile-patterned, double-colored fabric (for the obi, preferably real obi)
- Red and white ropes (for the obijime)
- Red felt (for the flower accessories)
- Gold flower accessories with pearl center (can mix and match if not possible to find)
- Pink plastic flowers of all shapes and sizes (for the headband)
- Metal headband (preferably thin width)
- Red kanzashi (to complement the headband)
Costume Construction
Kimono Top
Cut the black fabric according to the kimono sewing pattern that you can find online (or modify an existing kimono you own). Afterward, cut the other black fabric to line the collar and the skirt part of the kimono. Next, use the grey and silver fabric paint to draw the pattern on the sleeves of the kimono. While waiting for the paint to dry, use the gold paint to draw the two lines at the bottom of the clothes.
The white line at the collar portion is supposed to be separate wear. However, if you don’t feel like wearing too many clothes or want to save time and cost to get another piece of clothing, you can simply either paint the white lines or use a thin piece of fabric to sew onto the collar instead. The haneri is also supposed to be a separate inner dress, but you can also discount the effort by only sewing the piece that is visible onto the collar.
Normal kimono doesn’t have anything to keep it in place, which is why obi is very sturdy so the kimono stays put when worn. However, you can also sew a piece of ribbon or tie at the inner part of the kimono and another one at the outer part so that the kimono can stay in place and not dependent on the obi — especially since this costume also has gathered fabrics at the waist area.
Gathered Fabric and Accessories
Gather the chosen fabric and place them around the kimono before you tie the obi. You can secure the gathered fabric with a safety pin so it will be easier to disassemble once you are done cosplaying.
Make ribbons out of silver fabric and tie the middle part with stiff silver ropes that end with a tassel each. You can then use safety pins to pin these ribbons to the center of the gathered fabric after everything is in place.
Obi, Obiage and Obijime
If you are very particular about the pattern for all the fabrics, you can commission someone who can digitally replicate the pattern and print the file on a selection of fabric at some on-demand companies online. Alternatively, just find something similar.
In any case, you need to wrap the obi on top of both the kimono top and the gathered fabric. There is a tutorial on how to tie an obi – but you can also help make your life easier by separating the sash with the back ribbon.
You can use Velcro to stick each end of the sash, and then you combine it with a pre-tied ribbon using either a safety pin (last resort as it may not hold the weight) or a clip-on. In fact, this type of obi is gaining popularity.
After the obi is secured, you can continue with the obijime and obiage. They are supposed to be pretty much tied because the traditional kimono doesn’t have any hook or button, so the obi and its accouterments are the only ones that keep the dress together.
Make the ribbons from a stiff fabric and add the red flower accessories in the middle by making them from a sturdy felt fabric. The golden part can be easily bought from craft stores.
Headband, Flower Accessories and Kanzashi
You can buy a plain, metal headband as a base. Afterward, either buy similar flower accessories or make them using felt or crepe papers. Arrange the flowers as per the reference picture and then complete the look with a red-pink kanzashi.
Tights and Boots
The black tights and boots are available for sale pretty much everywhere, so find those that are similar to the picture. Afterward, secure the silver ropes around 2.0-2.5 inches (~5.0-6.0 cm) below the top of the tights. Since they have the tendency to slip down with the barest of movements, you can secure them with double-faced tape or keep securing them every now and then.
Alternatively, if you don’t mind some inaccuracies, you can always purchase the whole set online.
Hair or Wig Styling
The hairstyle for this costume is more or less the same as the one for the default costumes, barring the slight styling of the left fringe. Again, use hair gel to style your wig or hair accordingly. Tifa also doesn’t wear any earrings in this version.
Makeup
Compared to the rest of the costumes discussed here, Tifa here has more noticeable pink eyeshadows that match the headband accessories. She also wears either a full-blown lipstick or tinted lip gloss for this very costume. Please remember to put on the eyeshadow and lip gloss (or lipstick) after you have completed the usual skincare routine.
FAQs
Question: How do you cosplay as Tifa Lockhart?
Answer: First thing first, you need to determine which Tifa costumes you are looking to cosplay. Since the original Final Fantasy VII game, there have been several costumes made for Tifa. This guide has five different costumes to choose from, but there are even more costumes such as the cowgirl costume or the dresses she wore in the flashbacks when she was a young girl.
Once you know which costume you wish to make, you may start finding the necessary items, supplies and equipment to make them from scratch. Otherwise, you can purchase them on various online platforms as ready-made costumes. Do pay attention to where each accessory is placed and style the wig accordingly. Make-up is also very important to enhance the looks.
Finally, it is important to know her personality, her usual expressions and unique stances so you know how to pose at cons!
Question: Which Tifa costume is the easiest to make?
Answer: Each costume has its own challenge, and whether it is easy to make or otherwise will depend on your resources (and sewing and/or prop-making skills). I personally feel the Refined Dress is the easiest as there is less sewing and easy prop-making. The hardest for me would be the FF VII Remake Default Costume due to the number of props needed on top of the complex parts and fabrics used.
However, there are people who think that the default costumes are easier to make because they are better at prop-making, unable to sew due to lack of skills or absence of a proper sewing machine, or even find the materials and accessories for other costumes to be harder and more expensive to procure.
Whichever costume you decide to make, your love for the character will usually enable you to go against all odds and make them a reality.
Question: Why is Tifa Lockhart so popular?
Answer: While Tifa is certainly not the only popular character, one cannot argue that she is certainly one of the more popular ones. Based on the most recent poll by Famitsu, Tifa clinched second in the overall Final Fantasy VII Remake popularity ranking, and also technically the most popular female character based on the same poll. The number of die-hard Tifa fans surely can’t be underestimated!
Perhaps it’s because she’s the childhood friend of the protagonist, or perhaps she just looks so badass with her martial art abilities and sporty looks. Whatever the reason, it is undeniable that she has captured the hearts of many fans.
Speaking of which, there are also a number of Tifa cosplayers — so why not try cosplaying as her using the guide in this article?

