
Cosplaying is a fun and creative hobby that allows you to learn a craft and indulge in your theatrical side at an event. As I improve at making cosplays, I always strive to be more meticulous and accurate. That’s not a bad thing, but in the pursuit of emulating a character 1:1, some of that creativity can diminish.
That’s just one reason that makes Monokuma from Danganronpa a great candidate for a Cosplay. Unless you’re a bear, you will face some rather unique challenges for this costume, but they aren’t too hard to overcome with a bit of thought.
In this article, I’ll be going through Monokuma Cosplay and costume ideas with several ways to approach the project. I’ll also be going through a few important topics that will be useful if you take this Cosplay to an event or convention.
Bottom Line Up Front
Cosplaying something as unique as Monokuma means you’ll have to think outside the box and put a personal spin on the character. The most crucial parts to get right are the colors, so make sure you nail that sharp iconic black and white vertical split! A project like this relies heavily on your creativity and doesn’t have to break the bank!
Before You Begin
If you’re drawing a big question mark in your mind on how a Monokuma cosplay can possibly work, don’t worry! I’ll be going through some great ideas in ‘The Outfit’ section of this article. I think a few things are essential to go through first, though, including how this outfit will work if you’re going to a convention.
The Value of Source Images
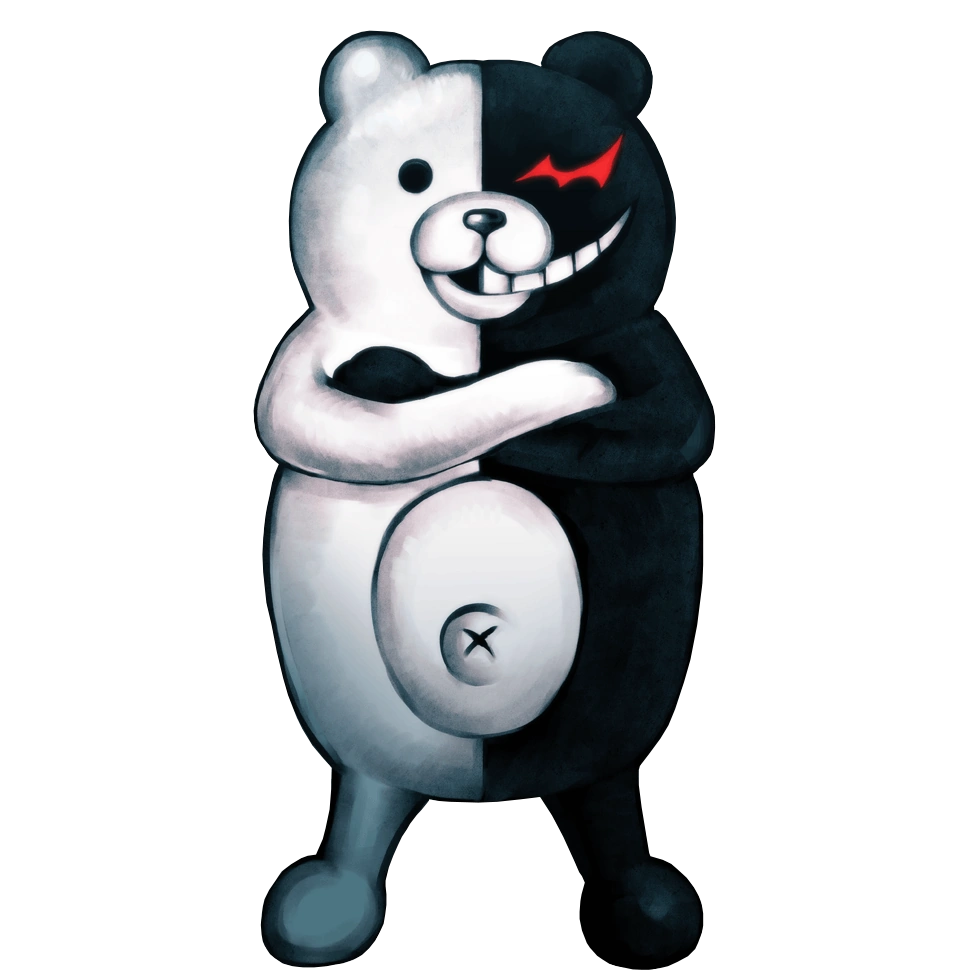
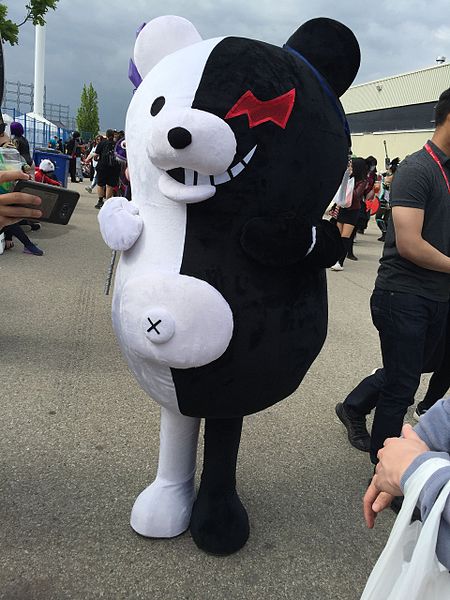
No matter what you’re cosplaying, it’s important to have as many pictures as possible to use as a reference. For Monokuma, it’s arguably a little less critical as accuracy will be almost impossible to achieve. Monokuma’s torso is quite simple, but you’ll want to get the menacing smile on his face right and his red eye, so grab as many pictures as you can. Screenshots from the video games will all do nicely.
Cosplay Can Be Uncomfortable
Sadly, there’s no sugar-coating this part! You’re cosplaying as a teddy bear, and even though you’ll look phenomenal when it’s all done, there are a few cons you need to consider. First of all, if you’re looking to emulate a ‘fluffy’ bear, you’re likely to get rather warm. Conventions are hot, stuffy places at the best of times, and fluffy materials can be itchy.
Materials like this tend to be hot to wear as many aren’t breathable. You can work around this but bare it in mind when designing your Cosplay. Make sure you’ll be happy wearing what you’re creating!
Dehydration is a Cosplayer’s worst enemy
This point goes hand in hand with comfort, but if you’re wearing a hot costume in a hot environment, you’ll be surprised how much water you need to drink.
Make sure you think about this and plan to take frequent breaks whilst you’re in costume. Having someone with you with drinks ready is never a bad idea either. I can’t stress this point enough, dehydration and overheating are 2 of the most horrendous sensations you can experience in a crowded convention hall.
Work To Your Budget
Monokuma is a cosplay that can be done on a budget but depending on how you choose to do it; the sky is the limit for how much you could spend! Everyone has a different budget they are comfortable with, so pick yours and stick with it.
The Outfit
With any Cosplay I’ve ever made, I always find the best way to plan them is to split the costume into its key parts from top to bottom. In this section of the article, I will be going through how you could approach each piece of the outfit in detail. I’ll also be suggesting some ideas towards the end that can dramatically change how you approach this project.
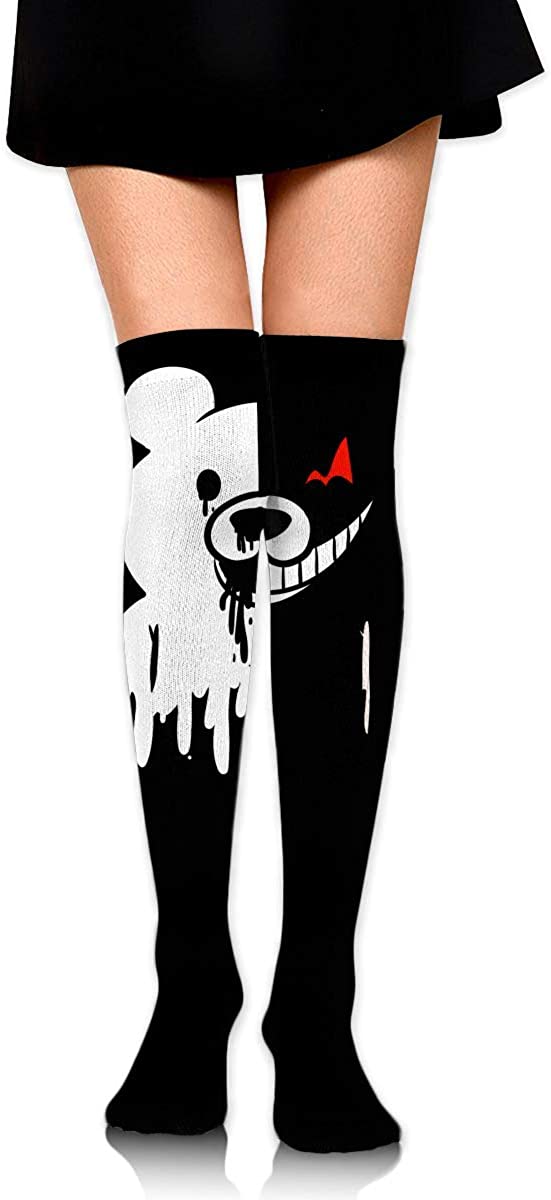
Ultimately, with a Monokuma Cosplay, the essential part is the color. Monokuma is split down the middle; black on the left and white on the right. If you can nail the color, you’ll be surprised how many people know who you’re cosplaying as from that alone!
Head
In many Cosplays, the head is the most identifiable part. This is mostly true with Monokuma, and there is a never-ending list of ways you could approach this part. I’ll be going over a few here, but please don’t be put off if I don’t mention an idea you already have in mind. Your spin on a character will ALWAYS be the best as it will be an extension of your creativity!
Hair/Wig
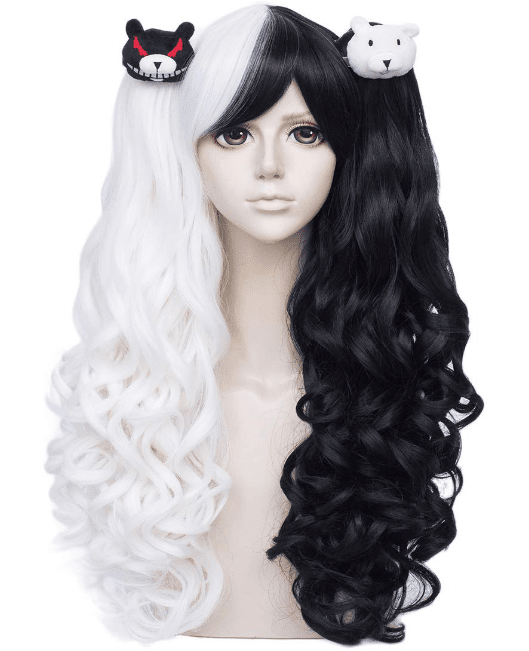
A simple but effective way of approaching Monokuma’s head is to wear a 2-Tone wig. A quick search on google for ‘2-Tone wig’ or even ‘Monokuma wig’ yields many results. A wig won’t be particularly accurate or even ‘bear-like’. Still, if you’re looking to make a more stylized version of the character, this is a great way to do it.
Face Paint/ Body Paint
This Cosplay is one where you can make full use of face/body paints. This can be a great way to achieve the black and white split on your face. Drawing on yourself in a mirror is quite tricky, so you may want help from a friend for this. Face paint is also excellent if you’re going to draw the smile on and even the menacing red eye. You could choose to do this with a wig or without.
The one crucial thing to remember when drawing on your skin is using products designed for that. One product I’ve seen used as an alternative is food colouring. But please, if you take just one thing away from this article, it should be this: Never, ever use food colouring on your skin!
Food colouring is meant to be ingested in small amounts. It can act as an irritant in its concentrated form on the skin. There are some rather graphic images out there of skin reacting to things like food colouring. Please don’t take that risk.
Monokuma’s Red Eye
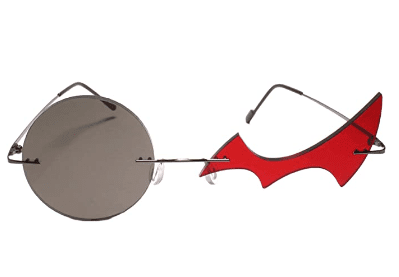
I love Monokuma’s evil red-eye because it breaks up the black and white colour scheme covering the rest of the outfit. The best way to add this to your Cosplay would be with red face/body paint or even make-up. You can try and emulate the shape of the eye (pictured above), or you could try and go for a more warped and ‘jilted’ version and smudge the red. If you’re going to smudge the paint, less almost always looks better.
If you want to make one of your eyes red
I tend to avoid changing my eye colour for Cosplay, but coloured contact lenses are always something you can look into. Make sure you consult an eye care professional or optician if this is something you want to do.
A striking red eye would look fantastic in a Monokuma Cosplay. Hygiene is paramount if you’re wearing a contact lens, so I would advise against wearing face/body paint if you do.
Want to hide your hair? No problem!
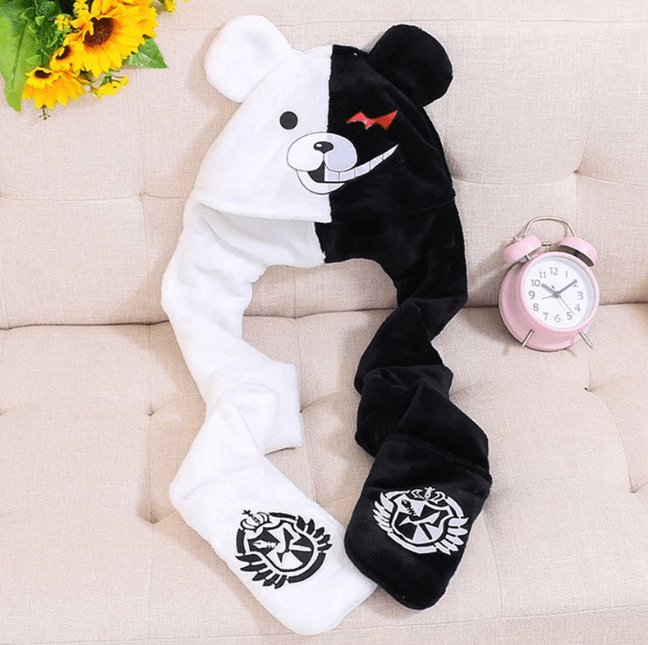
If you simply must have those cute teddy bear ears (I get that!), why not look for a beanie hat with ears? You could always sew on plush ears yourself, and as these are small, it would be a sewing project that doesn’t even need a sewing machine!
You could also try altering a hoodie if you like the hat idea. You can sew plush ears onto a hood without too much trouble. If your garment has a hood large enough to obscure your face, you can always add a few details to it, like Monokumas eyes and nose. This is a simple way to do the Cosplay, and it has the benefit of being more comfortable than face paint or a wig.
Headband with ears
A headband is a good option if you’ve got a fantastic wig and still want those adorable ears! A unique headband will usually be a DIY job (headbands with ears are common, but typically cat ears).
A thin headband with ears works so well because it won’t damage the wig underneath. If you’re new to Cosplay, this is a great little accessory to work on because even if it’s messy, nobody will see it if it’s on the top of your head!
Torso
There are dozens of ways to do Monokuma’s torso, and they all have pros and cons. I will explain a few ways to do it here but if you have something different in mind, absolutely do that instead!
A Little DIY
If you’re not afraid of pulling out the sewing machine, this is a great idea to try out. If you can find the same hoodie, shirt or t-shirt in black and white, why not stitch both together? Of course, stitching two pieces of clothing together isn’t quite as simple as it sounds.
If you want it to look good, you’ll have to ensure the join between both garments is straight and tidy. You also have to remember that the finished piece will be tighter than the original. This is a great way to keep that iconic black and white split on the Cosplay, but it can be expensive as you’ll be buying 2 of everything.
Not too keen on cutting clothes up?
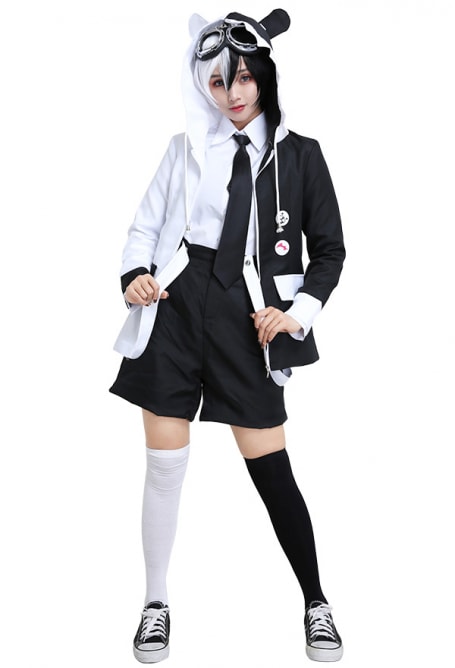
I completely understand where you’re coming from if you don’t want to ruin multiple clothing items for Cosplay. Fortunately, you don’t have to! The head of this Cosplay is what will be most identifiable. You can be flexible with the entire Cosplay as long as you’re wearing black and white.
You could wear a white shirt and a black tie and hoodie. How about a black top with white gloves? It will be more than adequate for a Monokuma Cosplay if you have that colour difference.
A Onesie can be a simple solution for the entire Cosplay!
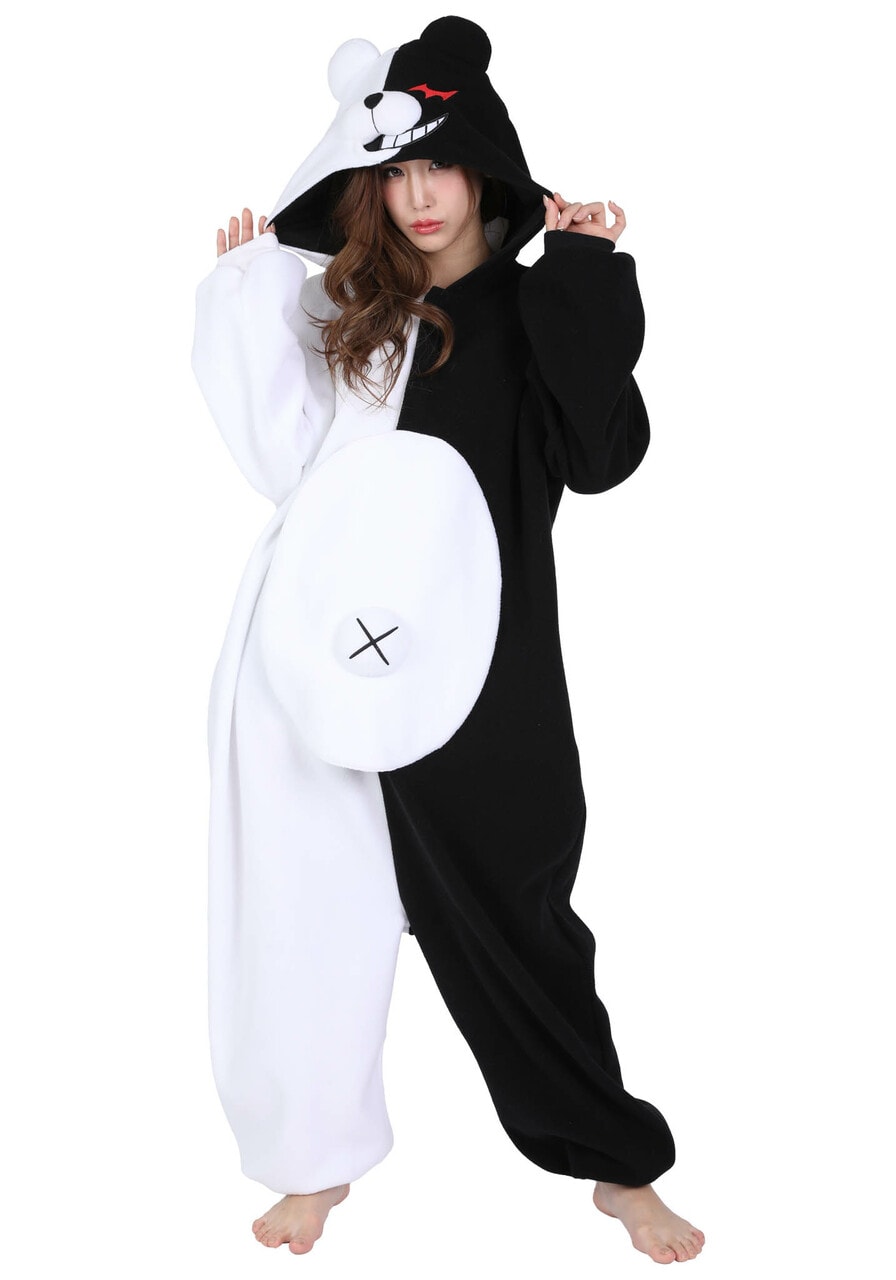
A Onesie is a great way to make Monokuma’s body! You may struggle to find a black and white Onesie, but you can stitch two together up the middle with a bit of careful sewing. A Onesie also gives you a great canvas to make the belly if you want to.
Monokuma’s belly is simply a white oval. If you want to make this part, try and keep the fabric similar to the Onesie. Even something inexpensive like fleece would do the trick.
Belly Button
Monokuma has an unusual protruding belly button with a small ‘X’ on the front. I don’t think this part is essential, but it’s easy to make if you want to include it. Any small ball wrapped in white material would be fine. A Table Tennis ball would be perfect because they are super lightweight and won’t pull the fabric when you sew it on. The ‘X’ is easy to add on with fabric paint or a marker.
Hands, Gloves, or Paws?
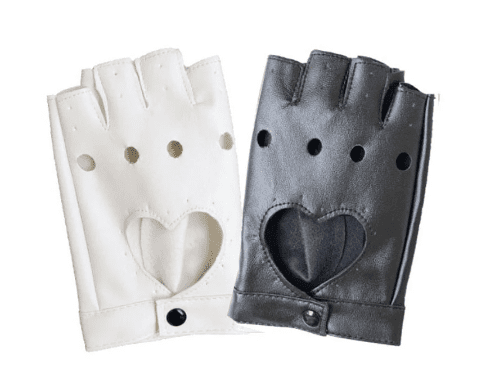
You don’t ‘need’ to cover your hands, but simple black or white gloves are great to stop them from standing out. Pick gloves that match the rest of your outfit, and if you can get a glove of each colour, that’s a bonus! Gloves aren’t too tricky to make if you’re up for some sewing and they don’t require a sewing machine either.
You can find dozens of guides for making cosplay gloves on YouTube, and the best thing about these is you can sew along with them! Polyester and Lycra are solid options for material if you want to make these yourself, thanks to their durability.
You can add paw prints to the gloves if you want to go the extra mile. These always look great but strictly speaking, Monokuma does not have visible paws.
Legs
You have many options for your legs, but you’ll want to base your choice on how you’re doing the torso. Stockings or leggings are perfect for continuing the colour split down to your legs. Multiple pairs shouldn’t be too expensive either.
If you’re not comfortable wearing stockings, black or white trousers will be fine. It’s much harder to achieve the colour split with trousers as joining two pairs together is quite tricky. I would recommend whatever colour trousers will stand out against the top you’re wearing for these.
An effective DIY option to change the colour of one leg is to wear a single stocking over trousers. Doing this can look a little odd if it makes one leg look thinner than the other, but try it out. If you like it, consider pinning up the stocking so it won’t slip down through use.
And finally, your feet!
Wearing accurate footwear can be a nightmare for Cosplay! Fortunately, with Monokuma, I would recommend comfortable black or white shoes unless you’re wearing something that already covers your feet. You could, of course, continue the black/white split down to your feet, but it will mean buying multiple pairs of shoes.
Monokuma’s feet aren’t particularly detailed in any source images I could find, so you have free reign over your footwear.
Props/Accessories
Monokuma doesn’t have any accessories you would associate with him. He does have cubs or ‘kubs’, though. If you could find a plush of a Monokub, it would look great in pictures!
Doing It Yourself
Everything in this section assumes you’re looking for pre-made items to alter them. If you want to try and make parts of this Cosplay from scratch, you have the freedom to approach them any way you wish. A great place to start is with Sewing Patterns. There are thousands of them available to buy online. They cover just about any item of clothing you can imagine.
I encourage you to experiment with materials but keep in mind the environment where you will use the Cosplay. Polyester is a reasonably inexpensive fabric, but it traps heat. On the other hand, something like Cotton is breathable and comfortable even when hot.
Think Outside The Box
Although it’s pretty advanced, another way to approach Monokuma’s head is with something like a helmet or a ‘head’ that you can wear over your own. If you take your time designing something that fits and nail the grin and red-eye, something like this will be mind-blowingly cool!
The sky is the limit when you make your cosplays from scratch. For example, you could even install a red LED light for the eye! I mentioned the dangers of dehydration in the ‘Before You Begin’ section; it’s something to keep in mind if you plan to make headgear like this.
Are you looking to splash out?
If money isn’t a concern and you want something that will turn heads, you could look into fur suits. I simply can’t do justice to how technical a fur suit can be here. Still, a costume like this will cover you from head to toe. It will dramatically alter your appearance, even down to your body shape.
You can look up guides to make a fur suit, but this will be leagues above what you would call an ‘advanced cosplay’. There are fur suit designers you can commission for something like this, and you should be expecting to pay well into the thousands if you decide this is the route for you.
Useful Resources
The wiki here has a few pictures of Monokuma and some great info if you’re looking to get into character.
There are many fantastic tutorials on how to make gloves on YouTube, like this one here
A Prop like a Plushie Monokuma or Monokub isn’t essential for this Cosplay, but some great images of Monokuma Kubs can be found here.
FAQs
Question: I don’t have a big budget. Can I Cosplay Monokuma?
Answer: Yes! At the bare minimum, I would say either a wig or face paint is mandatory, but after that, any black and white clothing you have will be fine! You don’t need to be rich to enjoy cosplaying, and with Monokuma, your spin on the character is what’s most important.
Question: Is Monokuma suitable for my first Cosplay?
Answer: Yes. The most important part of this Cosplay is either face paint or a wig, and once you’ve got that, you’ll look great as long as you’re wearing black and white. This Cosplay doesn’t require armour or weapons, and even the sewing is optional.
Question: What is a Sewing Pattern?
Answer: Sewing Patterns are physical guides to making clothing items from scratch. They contain everything you could need, from blueprints of the entire piece to material recommendations. Sewing Patterns are rather daunting at first glance, but if you’re willing to learn, you can make almost any piece of clothing you can imagine with them.